Perfect Gel Hair Look for Women How to Nail the Sleek, Glossy Style Everyone Is Obsessing Over in 2026
By Camille Rossi, Master Hair Stylist & Editorial Style Specialist | 12+ Years Creating Runway & Red Carpet Hair
She walked into my studio with a screenshot.
It was a photo from a fashion week street style account a woman in an oversized blazer, minimal makeup, and the most perfect slicked-back gel hair I had ever seen. Smooth as glass. Glossy as lacquer. Not a single strand out of place.
“I want this,” my client said. “But every time I try it at home, I look like I just got out of a swimming pool.”
I laughed. Because I’ve heard that exact sentence almost word for word from at least forty different women over the years.
The gel hair look is deceptively simple. It looks like you just ran product through your hair and walked out the door. But getting it right genuinely, photographically, impressively right requires understanding a few things that most tutorials completely skip over.
After 12 years doing editorial hair for fashion weeks, commercial shoots, and real women who want to look extraordinary in their everyday lives, I’m going to give you everything. The products. The techniques. The mistakes. All of it.
Why the Gel Hair Look Has Taken Over in 2026
This didn’t come out of nowhere.
The gel hair aesthetic — slicked back, ultra-smooth, high-shine — has been building momentum since late 2024. But in 2026 it has fully crossed over from runway editorial into everyday wearable style.
And the reason is beautifully simple: in a world of maximalism and information overload, there is enormous power in absolute sleekness.
Gel hair says: I made one decision about my appearance today and I made it completely. No half-measures. No fuss. No trying.
Trend Stat: TikTok searches for “gel hair women” surpassed 2.8 billion views in the first quarter of 2026 alone — making it one of the fastest-growing beauty aesthetics of the year.
It’s also a chameleon. Gel hair works for a board meeting. It works for a night out. It works on a Tuesday when you haven’t washed your hair in three days and you need to look like you absolutely have.
That last point? Speaking from personal experience.
The Gel Hair Look — Understanding What You’re Actually Going For
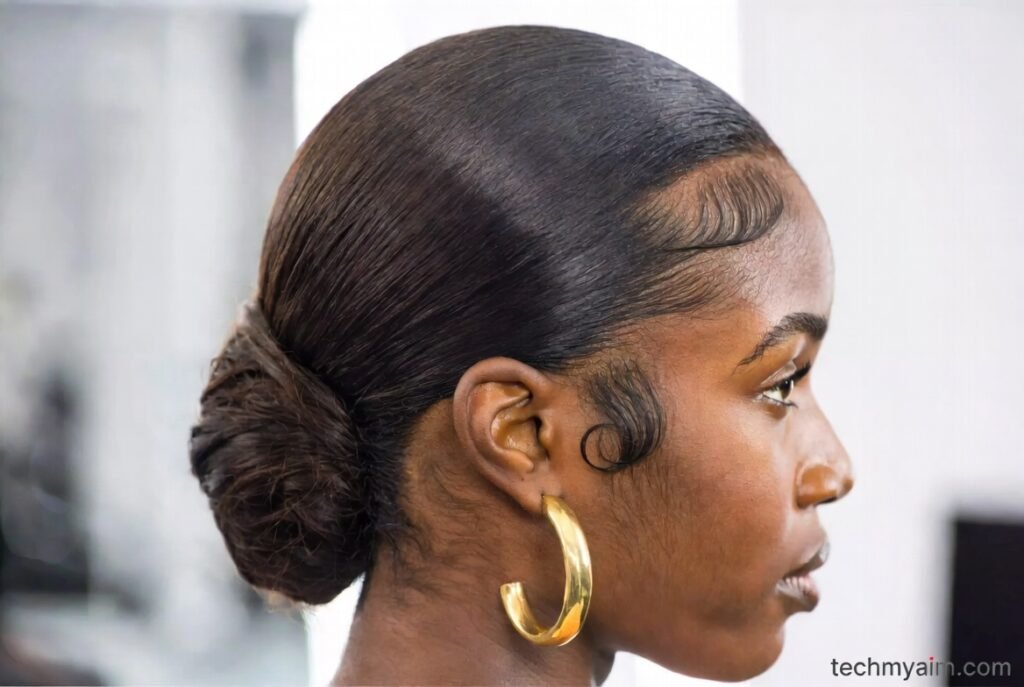
Before we get into technique, let’s define what we mean. Because “gel hair” in 2026 covers several distinct looks.
The Three Main Gel Hair Aesthetics
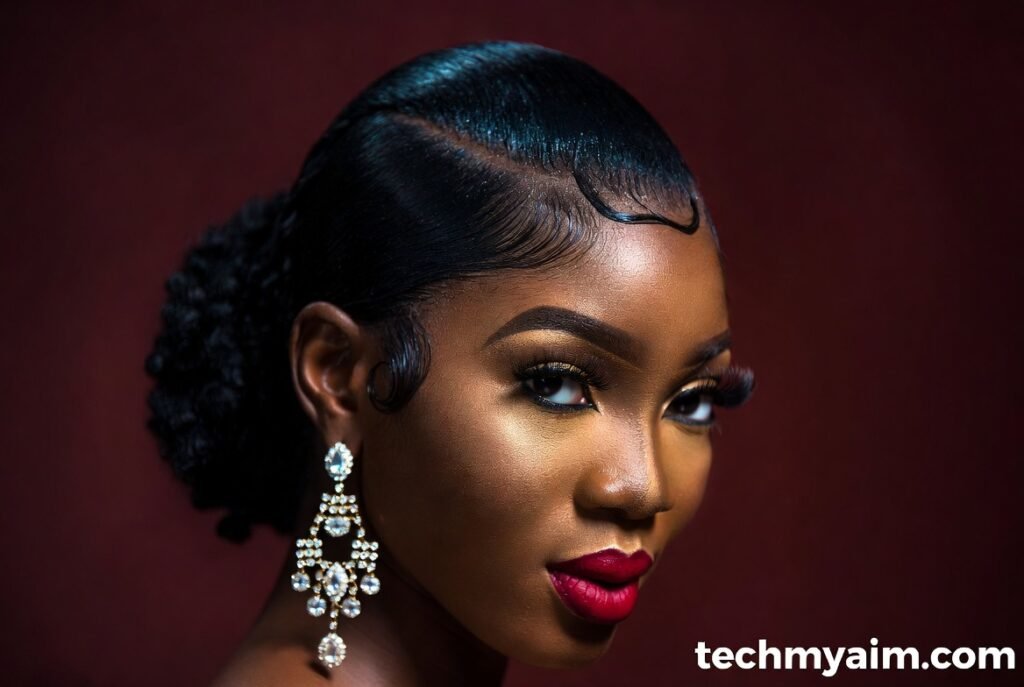
The Slicked-Back Bun
All hair smoothed back from the face, gathered at the nape or mid-back of the head into a tight, sleek bun. No flyaways. No bumps. The hairline is smooth and defined. This is the corporate power look. The fashion week uniform.
The Sleek Low Ponytail
Similar smoothness to the bun but worn as a ponytail at the nape — sometimes with a slight wave or texture through the tail for contrast. The gel work happens entirely at the roots and through the top section. The tail can be straight, wavy, or even curly.
The Slicked-Back Open Hair
All hair smoothed back from the face and left loose down the back — no bun, no ponytail. Just sleek, glass-smooth hair worn open. This is the most editorial of the three and requires the most product knowledge to execute without looking wet and heavy.
Expert Rule: The difference between gel hair that looks editorial and gel hair that looks like a wet dog is product selection and timing. Get both right and the look is transformative. Get either wrong and it collapses immediately.
Choosing the Right Products — This Is Where Most Women Go Wrong
Let me be completely direct about this.
Not all gels are created equal. And the drugstore gel you’ve had under your bathroom sink since 2019 is almost certainly not the right product for the look you want.
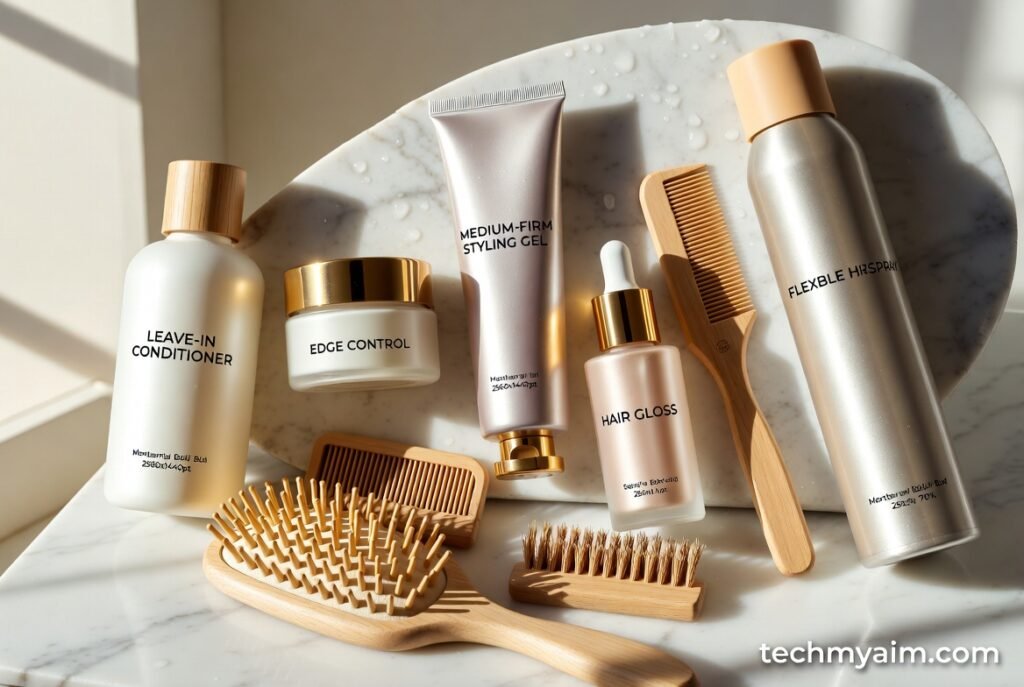
The gel hair aesthetic in 2026 is not achieved with traditional hold gels alone. It requires layering products strategically — each one doing a specific job.
The 2026 Gel Hair Product Stack
| Product | Job | When to Apply | Amount |
|---|---|---|---|
| Leave-in conditioner | Base moisture layer | On damp hair first | Quarter-sized |
| Edge control or pomade | Hairline and part sleekness | After leave-in, before gel | Pea-sized |
| Styling gel (medium-firm hold) | Overall structure and hold | On damp hair throughout | Generous — golf ball size |
| Hair gloss or shine serum | Final layer shine | On dry, set hair | 1–2 drops only |
| Flexible hairspray | Lock and flyaway control | Final step | Light mist, 12 inches away |
Insider Tip: The product that separates amateur gel hair from professional gel hair is almost always the hair gloss or shine serum applied last. Gel alone creates hold but can look matte or chalky once dry. One or two drops of a lightweight shine serum pressed over the surface of set gel hair turns it from “product-heavy” to “glass finish.” This single step changes everything.
Gel Types — Which One Is Right for Your Hair
| Gel Type | Best For | Hold Level | Finish |
|---|---|---|---|
| Water-based gel | All hair types, easy removal | Medium–firm | Natural to shiny |
| Oil-based pomade gel | Coarse, thick, or natural hair | Medium | High shine |
| Edge control gel | Hairline and baby hairs | Firm | Very glossy |
| Curl defining gel | Wavy and curly hair | Light–medium | Glossy, not crunchy |
| Hard hold gel | Extreme slicked styles, updos | Very firm | High shine |
| Flaxseed gel (DIY) | Fine or sensitive scalp hair | Light–medium | Natural shine |
How to Get the Perfect Gel Hair Look — Step by Step
The Slicked-Back Bun — The Complete Method
This is the most requested gel look I execute in my studio. And the one most women get wrong at home.
What You Need
- Leave-in conditioner
- Medium-firm hold styling gel
- Edge control
- Fine-tooth comb
- Boar bristle brush
- Hair elastic (fabric-covered, no metal)
- Bobby pins (matching your hair color)
- Light shine serum
- Flexible hairspray
The Full Technique
Step 1 — Start on Damp Hair This is non-negotiable. Gel hair works on damp hair — not soaking wet, not bone dry. Towel dry until hair is about 70% dry. If your hair is already dry, mist it lightly with a spray bottle of water mixed with a tiny amount of leave-in conditioner.
Step 2 — Apply Leave-In Conditioner Work a quarter-sized amount of leave-in conditioner through all of your hair from root to tip. This is your moisture base. Gel applied directly to dry or moisture-stripped hair will crack, flake, and look chalky. The leave-in prevents all of that.
Step 3 — Apply Gel Generously Take a golf ball-sized amount of medium-firm gel and distribute it through your hair completely — root to end. Don’t be shy. The number one mistake women make with gel hair is using too little product. More gel, applied evenly, gives you control. Too little gives you crunchy, patchy, disappointing results.
Step 4 — Comb Through Completely Use a fine-tooth comb to work the gel evenly through every section. Comb in the direction you intend to style — backward for a slicked-back look. This distributes product evenly and starts building the smooth foundation.
Step 5 — Brush Back With Boar Bristle Brush Switch to a boar bristle brush and brush all hair firmly back from the face and crown. Use long, smooth strokes — not short, choppy ones. The boar bristle brush grips the gel-coated hair and polishes the surface to a smooth finish that a comb alone cannot achieve.
Step 6 — Edge Control on the Hairline Using your fingertip, apply a pea-sized amount of edge control along your entire hairline — temples, forehead edge, and nape. Use a soft baby toothbrush or edge brush to smooth and define. Lay your baby hairs intentionally — either swept back cleanly or shaped into small decorative swirls if that’s your aesthetic.
Step 7 — Gather and Secure Gather all hair at your desired position — nape for a low bun, mid-crown for a high bun. Secure with a fabric-covered elastic. The smoother you can make the gathering motion without disturbing your root work, the better.
Step 8 — Form the Bun Twist the ponytail and wrap it around the base. Secure with bobby pins pushed in the direction that locks the bun without visible gaps. For a very sleek bun, wrap a small amount of gel on your fingertips around the bun surface and smooth before pinning.
Step 9 — Let It Set This is the step nobody wants to hear. Let your gel hair set completely before touching it — minimum 20 minutes. Touching gel hair while it’s still wet disturbs the smooth surface and creates bumps you cannot fix without starting over. Sit down. Have your coffee. Let the gel do its job.
Step 10 — Final Gloss and Spray Once fully set, take one drop of shine serum on your palm, press your palms together, and lightly press over the surface of your hair — not rubbing, just pressing. Finish with a light mist of flexible hairspray from at least 12 inches away.
Expert Rule: If you see any bumps or unevenness after the gel sets, do not try to fix them dry. Mist lightly with water, smooth with the boar bristle brush, and let set again. Trying to fix dry gel creates more texture, not less.
The Sleek Low Ponytail — Refined Method
Step 1: Follow steps 1–5 from the bun method above.
Step 2: Instead of gathering at the nape for a bun, secure at the nape in a low ponytail with a fabric elastic.
Step 3: Apply a thin layer of gel over the top of the secured elastic area and smooth with your brush one final time.
Step 4: Wrap a section from the tail around the elastic to hide it. Pin underneath.
Step 5: The tail itself can be left natural, waved, or straight — your choice. The gel work lives entirely in the top section.
The Slicked-Back Open Hair — Advanced Method
This is the trickiest of the three. But when it works? It’s jaw-dropping.
Step 1: Apply your full product stack to damp hair.
Step 2: Brush all hair straight back from the face — no part, no side sweeping, straight back.
Step 3: Instead of a fine-tooth comb, use a wide-tooth comb for the length to prevent over-manipulation.
Step 4: Let hair fall naturally down the back without gathering or twisting.
Step 5: The critical step — use a headband or silk scarf tied around the perimeter of your hairline while the gel sets. This holds the root area smooth without disturbing the length. Remove after 20–30 minutes.
Step 6: Apply shine serum along the surface. Mist with flexible spray.
Insider Tip: For the slicked-back open hair look, the product-to-hair ratio is everything. Too much gel makes the length look wet and heavy. Too little and the roots lift before the style sets. Start with a golf ball size and adjust based on your hair’s density. Fine hair needs less. Very thick or natural hair needs more — sometimes significantly more.
Gel Hair for Different Hair Types — Customized Approach
Fine or Thin Hair
Fine hair is actually wonderful for gel styles — it smooths easily and holds shape well.
The challenge: Too much product weighs fine hair flat against the head, making it look sparse.
The fix: Use a lightweight water-based gel rather than a heavy pomade. Apply sparingly — a walnut-sized amount instead of a golf ball. Focus product at the roots and surface rather than saturating the length.
Thick or Coarse Hair
Thick hair requires significantly more product and more time.
The challenge: Thick hair fights smoothness. Gel dries before you’ve finished applying it evenly.
The fix: Work in sections. Apply gel to one section, comb through, move to the next. Never try to apply gel to very thick hair in one large handful — it never distributes evenly. Use an oil-based pomade or edge control mixed with your styling gel for maximum sleekness.
Natural or Coily Hair
Gel styles on natural hair are absolutely stunning — and have deep cultural roots in Black haircare traditions.
The challenge: Maintaining definition and sleekness while respecting the natural hair’s moisture needs.
The fix: Never apply gel to dry natural hair — always damp. Use a flaxseed gel or a natural-hold gel specifically formulated for natural textures. Apply in sections using the smoothing technique. For slicked styles on natural hair, a combination of a moisturizing butter base followed by a firm-hold gel gives the best combination of sleekness and moisture retention.
Wavy or Curly Hair
The challenge: Sleek gel styles fight against wave and curl patterns.
The fix: Decide before you start whether you want to fight the curl or work with it. For a fully slicked style, blow dry smooth first then apply gel. For a gel look that honors the curl, use a curl-defining gel and smooth only the root area and hairline — letting the curl do its thing through the length.
The Biggest Gel Hair Mistakes — And Exactly How to Avoid Them
I see these in my studio constantly. From clients who’ve tried this at home and given up.
Mistake 1: Starting on hair that’s too wet Soaking wet hair plus gel equals a look that takes hours to dry and never achieves the right finish. Always towel dry to 70% first.
Mistake 2: Using too little gel The most common mistake by far. Gel hair requires more product than you think is reasonable. Trust the process.
Mistake 3: Touching it while it sets Patience. 20 minutes minimum. Walking out the door with gel hair that hasn’t fully set is how you end up with texture and bumps by lunchtime.
Mistake 4: Skipping the shine step Gel alone looks heavy. Gloss serum transforms it. Never skip this step.
Mistake 5: Using the wrong brush A paddle brush won’t give you the smooth finish a boar bristle brush delivers. Invest in the right tool — it makes a genuine difference.
Mistake 6: Trying to fix dry gel directly Always mist with water first. Always.
Gel Hair Looks by Occasion — Quick Reference
| Occasion | Best Gel Look | Key Detail |
|---|---|---|
| Corporate meeting | Sleek low bun | Ultra-smooth, no flyaways |
| Night out | High slicked bun | Statement earrings visible |
| Casual day | Slicked-back ponytail | Slightly relaxed tension |
| Fashion/editorial | Open slicked-back hair | Maximum glass finish |
| Wedding guest | Low bun with baby hair art | Defined edges, accessorized |
| Gym to street | High bun | Quick, functional, still chic |
| First date | Sleek low ponytail with wavy tail | Polished but approachable |
How to Remove Gel Hair Without Damaging Your Hair
This part matters more than most people realize.
Never dry-brush gel out of your hair. Gel that has set hard creates friction when brushed dry — and that friction causes breakage, especially on already-processed or fragile hair.
The Right Removal Method
Step 1: Saturate hair with warm water in the shower before applying any shampoo. Let the water soften the gel completely — at least 60 seconds of running water.
Step 2: Apply a clarifying or gentle sulfate shampoo and work through the hair before rinsing. The shampoo dissolves the gel bond.
Step 3: Rinse thoroughly. Repeat if needed.
Step 4: Follow with a deep conditioner or hydrating mask — gel styles, especially frequent ones, can dehydrate the hair shaft over time. A weekly deep condition while regularly wearing gel styles is non-negotiable for maintaining hair health.
Expert Rule: If you wear gel styles more than three times per week, use a clarifying shampoo once weekly to prevent product buildup on the scalp. Buildup left on the scalp long-term can block follicles and contribute to shedding. Beautiful gel hair and healthy hair are not mutually exclusive — but they require maintenance.
The gel hair look is one of those rare beauty choices that works harder than it appears to. It’s not just a hairstyle — it’s a statement. It says you are intentional. Composed. Unbothered by the chaos around you.
And with the right technique? It genuinely looks like that. Every single time.
You have everything you need now. The products. The steps. The fixes for when things go sideways. Go make the look yours — because there is no version of it that isn’t stunning on a woman who wears it with confidence.
Frequently Asked Questions (FAQ)
Is gel hair bad for women’s hair if worn regularly?
Gel itself is not inherently damaging — but the way it’s applied, worn, and removed can be. The three main risks of regular gel hair are: scalp buildup from inadequate cleansing between styles, breakage from manipulating gel hair while dry, and dehydration from gel drawing moisture away from the hair shaft over time. All three are completely preventable. Use a clarifying shampoo once weekly, always remove gel with saturated warm water before shampooing, deep condition weekly, and never brush or manipulate hair with set, dry gel in it. With these habits in place, gel styles can be worn daily without meaningful damage to healthy hair.
What is the best gel for women with fine or thinning hair who want the slicked look without weighing hair down?
For fine or thinning hair, the best gel options are lightweight water-based gels or aloe vera-based styling gels — both provide hold and sleekness without the heavy, flattening weight of oil-based pomades or hard-hold gels. Brands like Eco Styler Olive Oil Gel (used sparingly), Kinky Curly Knot Today, or a homemade flaxseed gel are all excellent for fine hair. The key technique adjustment for fine hair is applying gel in a thin, even layer rather than a heavy saturating coat — and using a boar bristle brush to smooth rather than hands alone, which tend to over-apply in specific areas and create uneven weight distribution.
How do I get rid of the white cast or flaking that happens when my gel dries?
White cast and flaking from gel almost always come from one of three causes: applying gel to hair that is too dry, using a gel with high alcohol content on already-dry or porous hair, or using too little gel unevenly so some sections dry out faster than others. The fix is straightforward — always start on damp hair with a moisture base (leave-in conditioner) underneath your gel, choose an alcohol-free or low-alcohol gel formula, and apply generously and evenly throughout. If white cast still appears after trying these adjustments, switching to a glycerin-based gel or a natural flaxseed gel almost always eliminates the problem completely — both formulas dry transparent and flexible rather than white and rigid.