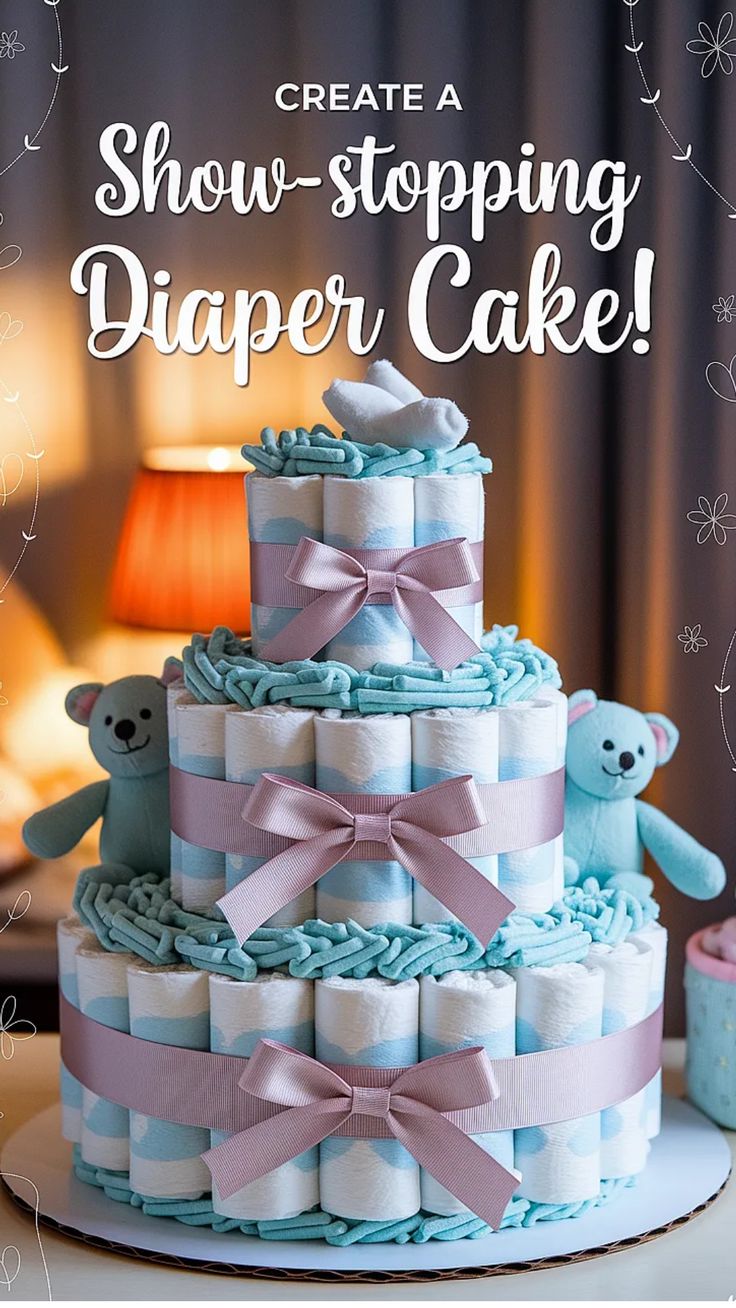
Looking for a baby shower gift that’s as practical as it is adorable? Enter the Pacifier Diaper Cake a charming DIY creation that turns everyday baby essentials into a show-stopping centerpiece. It’s not just a gift; it’s a sweet gesture filled with love, effort and a whole lot of creativity.
Whether you’re a crafty parent, a thoughtful friend, or a shower host wanting to impress, this step-by-step guide will walk you through how to create a pacifier diaper cake that’s Pinterest-worthy and budget-friendly no fancy tools required.
Let’s get started!
Why Choose a Diaper Cake Gift?
A diaper cake is more than just cute it’s incredibly useful. New parents go through dozens of diapers each week and adding essentials like a pacifier, baby socks, or lotion turns your creation into something truly thoughtful.
Plus, when you DIY it, you’re gifting not just supplies but your time and care something no store-bought gift can match.
Materials You’ll Need
Here’s what you’ll need to make a basic 2-tier pacifier diaper cake:
🎀 Diapers:
- 30–40 disposable diapers (size 1 or 2 recommended)
🎁 Core Materials:
- 1 baby bottle (for the center)
- 1–2 pacifiers
- 2 baby socks or mittens (optional for decoration)
📏 Assembly Tools:
- Rubber bands (various sizes)
- Ribbons (various widths and colors to match your theme)
- Hot glue gun (or double-sided tape for no-melt safety)
- Scissors
- Cake board or round cardboard base
💡 Optional Decor:
- Mini plush toys
- Baby lotion bottles
- Washcloth flowers
- Gift tags or cardstock signs
- Tulle or fabric for wrapping
Step-by-Step Instructions
Step 1: Roll the Diapers
Start by rolling each diaper from the waistband down and securing it with a small rubber band. This will give you neat, uniform rolls that are easier to stack.
Pro Tip: Place the printed side of the diaper on the inside while rolling to keep your cake looking clean and white.
Step 2: Build the Base Layer
Place your baby bottle in the center of your cake board. Surround it with about 20 rolled diapers, creating a tight circle. Secure the entire base layer with a large rubber band or ribbon.
If you’re making a second tier, add another circle of about 10–12 diapers on top, again surrounding the bottle and securing with a band.
Step 3: Add the Pacifier & Decorations
This is where it gets fun!
- Attach the pacifier to the front of the top tier using ribbon or a soft rubber band.
- Tuck baby socks into the ribbon bands like rosebuds.
- Add a plush toy or baby bottle to the top if desired.
- Use colorful ribbons to wrap around each tier and cover the rubber bands.
Step 4: Secure & Style the Cake
- Use hot glue (on the ribbon, not the diapers!) to ensure everything stays in place.
- Add cardstock signs like “Welcome Baby” or “Sweet Dreams.”
- Wrap the entire cake in clear cellophane or soft tulle for a professional, gift-ready look.
Gift Presentation Tips
- Place your diaper cake on a cake stand or round tray to elevate the look.
- Tie a giant bow on top or add a custom baby name tag.
- If delivering the gift to a hospital or home, wrap it in a protective layer of soft fabric.
Frequently Asked Questions
Can I use cloth diapers instead of disposables?
Yes! Just be mindful that cloth diapers are bulkier, so you’ll need fewer to build the tiers.
Is this gift safe for newborns?
Absolutely, as long as the decorative items are securely fastened and all materials are baby-safe (fragrance-free, BPA-free pacifiers, etc.).
Can I personalize it for a baby boy or girl?
Of course! Use color-themed ribbons and baby items that suit the parents’ style or nursery theme.
Final Thoughts
A pacifier diaper cake is a unique and heartwarming gift that checks every box: useful, thoughtful and downright adorable. It’s perfect for baby showers, hospital visits, or a “just because” surprise for expecting parents.
By taking the time to craft this DIY gift, you’re creating more than just a present — you’re giving the new family a little piece of joy they’ll remember long after the diapers are gone.
Save This for Later!
Planning a baby shower or looking for inspiration? Pin this guide to your DIY Baby Gifts board on Pinterest so it’s there when you need it!